


I upgraded the water heater in my fifth wheel today. I took a lot of pictures and decided to post them so people could learn to do this themselves. The old water heater was an Atwood 6 Gallon Gas/Electric water heater. We upgraded to a Girard Tankless On-Demand gas water heater. A 6 gallon water heater is great for short showers and just doing dishes, but with the on-demand type of water heater you never run out of hot water plus you have a thermostat so you can set the water temperature. The retail price of the new water heater was $719.69 and the door to cover the larger hole for the Atwood water heater was $52.89. An RV technician is probably going to charge between 2-3 hrs for the installation.
Before we start to work on the water heater there are several things we need to make sure we do. These items can save our life or at least keep us from getting hurt.
OUR PROPANE TANKS SHOULD BE TURNED TO THE OFF POSITION AND THE PIGTAILS UNSCREWED FROM THE TANKS. We do not want to start a fire or cause an explosion.
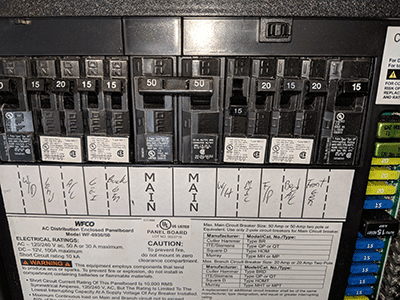
The water heater breaker in the breaker box should be flipped to the off position. I recommend that your main breaker be flipped to the off position. Unplugging you RV from shore power will also give you added protection. The last thing we want to happen is to have someone else come along while we are working and flip a breaker or plug the unit in and shock us. With all 3 things off the odds that this will happen are reduced.
Make sure the switches for the water heater are in the off position. We will also be removing the negative terminal from the coach battery. An RV water heaters control board runs off of 12 volts DC. So even though there is no shore power, the unit can try to start on propane if there is 12 volts DC still getting to the unit.
Next we want to turn off the water pump and disconnect the city water connection. After these are disconnected we will want to open and close all of the faucets in the RV to relieve any pressure in the lines. If there is pressure in the lines when we go to drain the water heater, the plug could shoot out and hurt you.
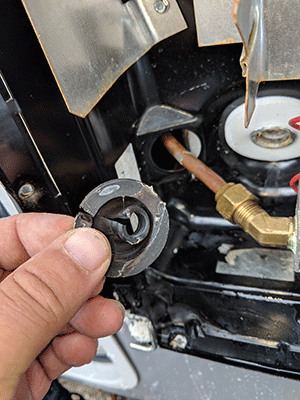
Now we are ready to begin taking out the old water heater. At the top of the water heater is a pressure relief valve that we are going to want to open. At the bottom left of the water heater is a nylon plug. You will need either a 7/8″ or a 15/16″ socket to remove this plug. As you start removing the plug water will start coming out and when the plug is fully removed water will be flowing rapidly until the tank is empty.
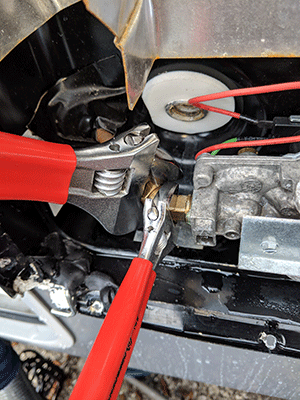
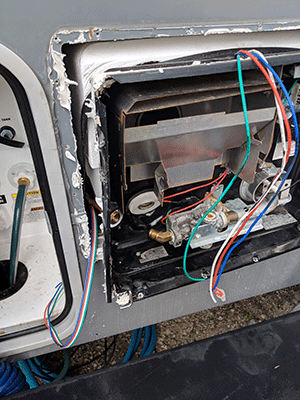
After the tank is empty we will need two crescent wrenches to remove the propane connection. Obviously we need to make sure there are no open flames around, because there will be a small amount of propane in the lines. Once the propane line is disconnected we will need to remove any sealant around the line and the rubber grommet so we can carefully push the propane line through the hole in the water heater.
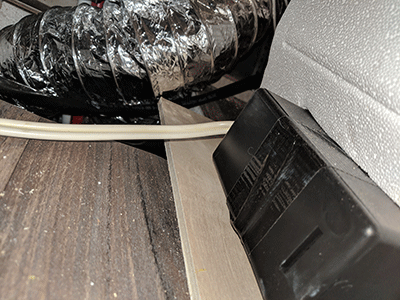
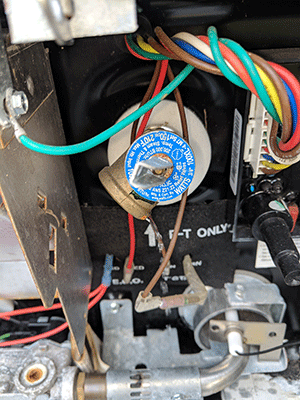
Because I have a fifth wheel I have to go into the large basement area to get to the back of my water heater. Depending on the type of RV you have there may be a panel to remove or a compartment in which the water heater access is in. There is a 120 volt 12/2 power line going to the back of the water heater for the heating element. Since the power is disconnected it is safe to disconnect this line. Since the Girard Tankless On-Demand water heater does not use 120 volts we will not be turning this breaker back on. We need to make sure we put wire nuts on these wires and tape them so there is not a live line behind the water heater. We will see 4 wires going to the water heater that are blue, orange, white, and green. These are our 12 volt DC power wires. We will be cutting these making sure we leave enough to reach the back of the water heater so we can wire the new one. The last thing we are going to do back here is disconnect the water lines. If these are not marked we will want to make sure we mark them so we connect the new water heater properly. The water line on top is the hot water coming out of the water heater and the line on the bottom is the cold water going into the water heater.
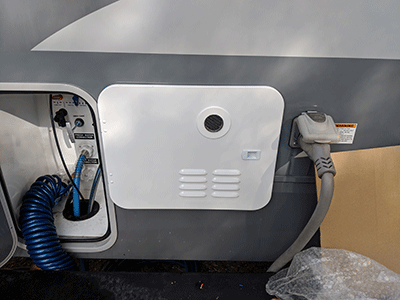
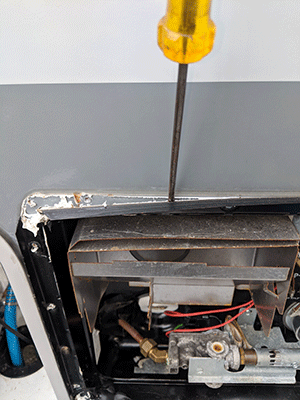
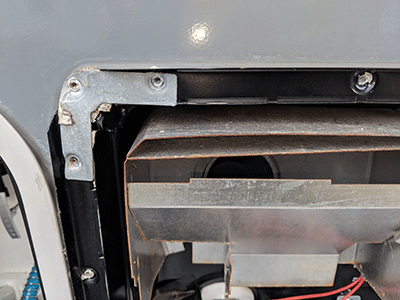
Now that everything is disconnected we can remove the water heater. There are several screws around the frame of the water heater that we will need to remove. Most of the time these are square head screws. After we remove the screws we will need to use a razor blade to cut any sealant around the outside of the water heater. We can use a screw driver to pry the water heater away from the wall. The butyl tape that is behind the water heater helps keep water out of the compartment of the RV. We can now remove the old water heater from the RV and set it to the side. The butyl tape that is left on the side of the RV should be removed and the area should be cleaned well.
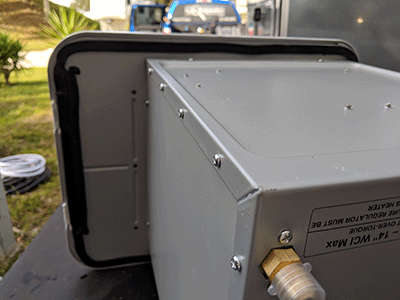
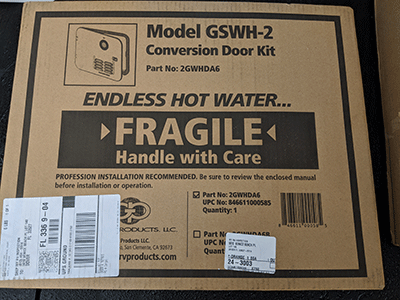
The new Girard water heater I installed is part number 2GWHAM and the access door that fits where the Atwood 6 gallon water heater was is part number 2GWHDA6. Once these are unpackaged we can attach the access door to the water heater using 8 screws. The screws did not come with the kit so I used 3/4 inch self tapping screws to attach it. The water heater can now be placed face down on the table. We will need to put new butyl tape around the inside of the access door.
With the water heater ready to install we just slide it into the space where the old water heater was making sure to cover the hole completely with the access door. I used some of the screws that held the old water heater in place to attach the new water heater to the sidewall of the RV.
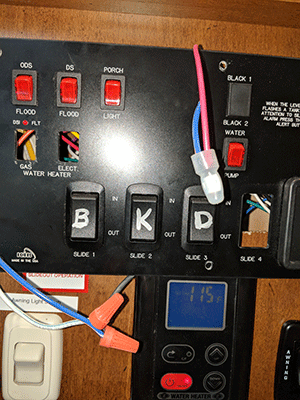
Next we will want to go inside where the switches for the water heater are and pull them off of the wall. The orange wire will be connected to the gas switch. You can leave that connected to this switch if you would like another on/off switch for the water heater. I took the 12 volt + wire from the switch and used a wire nut and electrical tape to connect it directly to the orange wire. The white wire is connected to the electric switch. I disconnected the white wire and will be using it for the new thermostat for the water heater. The blue wire goes to the light that lets you know when the Atwood water heater did not fire on propane. I cut this wire from the light and will be using it also for the thermostat. The green wire is the ground and you will probably not be able to see where it goes without tracing it. More than likely it is screwed to the frame somewhere so that it is grounded.
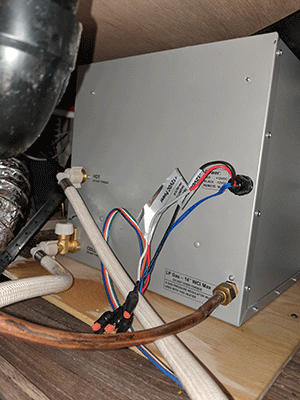
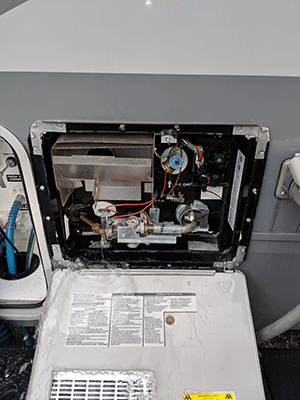
Back at the back of the water heater we have some connections to make. The first connection is our propane line. My propane line is copper and you must be very careful not to crimp it when bending it into position. Using a crescent wrench we will tighten the connection to the back of the water heater. Next we will connect our water lines. The cold water goes on the bottom again and there is a pressure adjustment knob on the connection. I turned mine counter clockwise as far as I could to allow maximum water flow. The hot water line goes on the top connection. Before wiring the water heater make sure the on/off switch on the front of the water heater is in the off position. I used wire nuts and electrical tape to connect the wires. The red wire on the water heater goes to the orange wire coming from the RV. The black wire on the water heater goes to the green wire coming from the RV. One of the blue wires from the water heater will connect to the white wire and the other to the blue wire coming from the RV.
Now we need to test our connections. At this point we need to reconnect everything we disconnected before we started except the water heater breaker. The water heater breaker is connected to the 120 volt line the we didn’t need it anymore behind the water heater. It is suggested that a LP leak test be performed using a manometer to verify there is not a propane leak. Once we know we do not have a propane leak we can reconnect the city water connection and make sure there is not a water leak behind the water heater. If you have a LP or water leak it is recommended that you fix this before moving on. Be sure to leave your propane and water on after your tests.
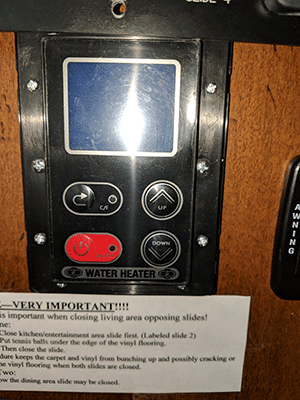
Going back inside with our water heater thermostat we need to drill a hole where we are going to mount it near our old switches to run the wires from the thermostat through. You will need to use 2 screws to mount the thermostat to the wall. The 2 black wires from the back of the thermostat need to be connected to the blue and white wires with wire nuts and electrical tape. If you did not cover the old switches with the thermostat you will want to replace the old switches to cover the holes.
The moment of truth is upon us. Go out to the water heater and turn the on/off switch on the water heater to the on position. Go back to your thermostat and press the power button to turn the water heater on. The up and down arrows allow you to set the water temperature to your preference. Go to any faucet in the RV and turn the hot water on until the water heater kicks on. Everything should work as intended. Now you have as much hot water as you want on-demand.
Author: Jason
Jason Is An NRVIA Master Certified RV Inspector. He has won the NRVIA Service Excellence Award and was named NRVIA member of the month in March of 2018.